
(This article is a part of the Rigify series: go to the overview page so you can start from the beginning. 🙂 )
Going deeper into Rig Customization with Rigify
In the previous chapter, you learned how to create Rig Types (Building Blocks) for Rigify. We then practiced by creating a Humanoid meta rig and giving it ears and tail. That was a useful exercise but we stayed close to the prebuilt stuff. Time to move away from that.
In this part we’ll rig a simple yet weird asymmetrical character.

Plan your Building Blocks
Planning is important whether you rig with Rigify or with traditional tools. However, Rigify makes planning extremely simple. When rigging with this addon you’re not so much the rigger, as you’re a “director”.
Take a look at the image of the character (better still, download the free base mesh from HERE) and imagine what kind of Building Blocks you’d use to rig it. As a reminder here are the main ones (advanced Rig Types are omitted):
- LIMBS: leg, arm, paw, palm, finger, tentacle
- SPINES: spine, head, tail
- BASIC: single bone, bone chain
- OTHER: face
Two things to keep in mind here.
- There is no “right” answer. Depending on their needs each artist may use a slightly different set of Building Blocks
- Don’t be afraid to experiment. Rigify is very flexible. If your rig doesn’t work as expected after Generation, just go back to the meta rig, tweak it and Re-Generate.
Here are the parts I chose:

I think post body parts are logical. Here are some that may need further info.
Tentacles (limbs.tentacle) as fingers
Tentacle are one of my favorite Rig Types because they have so many applications. From tentacles to fingers and claws to face rig helpers to muscle rigs (examples of the last two will be shown in the Advanced Chapters).
I can probably create a side course called “Rig Anything with Rigify Tentacles”. 😛
But limbs.simple_tentacle is commonly used as animal figers/claws. Just take a look at some of the prebuilt Animal Meta Rigs and you’ll see what I am talking about.
You could use limbs.finger as well. Just make sure it’s a chain of two bones (even tho the Finger sample gives you three bones by default. )
spines.super_head for the Head (Duh?)
This choice may appear obvious but in the case of this character, it’s not. The spines.super_head actually creates a head and a neck but our alien doesn’t really have a neck. But after experimenting I found that the head Rig Type did the job. Alternatively, you could just use a basic.super_copy and it should be a simple but effective solution.
The point I am trying to make is that you shouldn’t be too influenced by the names of the Rig Types. Try to understand the functionality of each Building Block and then you can make creative decisions as to which one to use for a specific purpose.
Basic.Super_Copy (single bone) as Eye Control
I want to add a simple control for the rotation of the eye of my character. Basic.super_copy will do the trick here.
Add the Rig Types and align them to your Character
I am not going to go into a lot of details about adding each Rig Types. If you watched/read the last section you should know how to create them either from a sample or starting from a single bone.
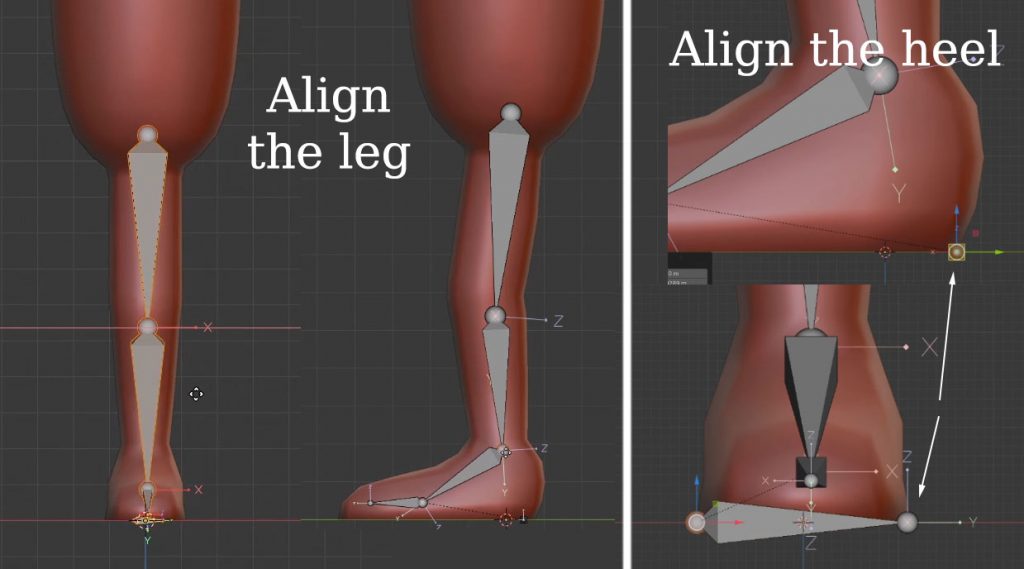
The Leg
Create a limbs.leg from a sample and align the armature to the shape of the character’s leg. Don’t forget to scale and position the heel bone as we practiced several times already.
The Spine
For the spine I’ll use a sample again. The chain of four bones works well for this character but any chain of 3 to 8 bones should work as well. Depends on how much flexibility and control you want. Make sure you align the bones to the curvature of the character.

The Arm
I’ll add a limbs.arm sample and align it to the top left arm. Easy.
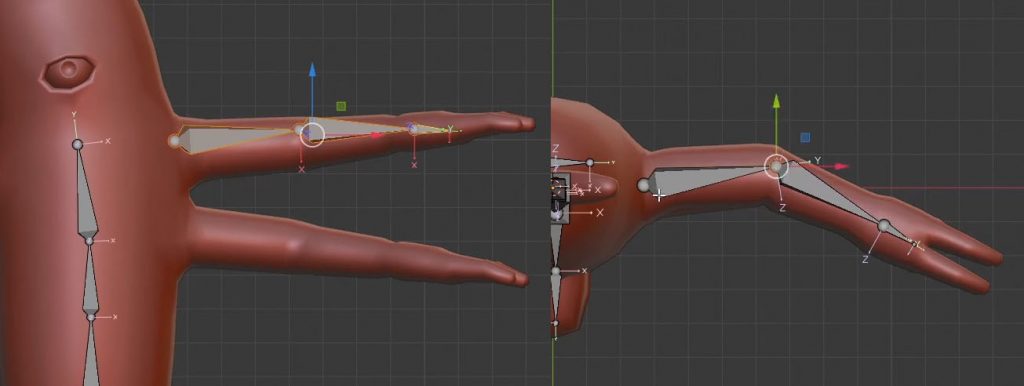
The Fingers
As I mentioned I’ll use the limbs.finger Rig Type for the fingers. My character’s fingers have only two “phalanges” (the fancy word “a bone of the finger or toe”). If you create the “tentacle sample” you’ll get three bones so delete the last one. Do not delete the first one tho as it defines the Rig Type.
Align the two bones to one of the fingers of the top left arm, then duplicate it (shift+D) over to the other finger.

Copying Arm and Fingers
We can copy the arm&fingers we just created over to the other two arms. For the bottom left arm that’s as simple as duplicating the whole arm and moving it down a bit. Make any necessary final adjustments by moving the individual bones.

Rigging the arm on the opposite side can be problematic. The easiest approach is to make sure the arm and fingers have “.L” in their name and use Blender’s Armature > Symmetrize feature. Then you can simply fine-tune the alignment and you’ll have a usable armature.
If you manually duplicate and rotate the bones however you’ll create an interesting problem.
Controlling Bone Roll
I explain this concept in the video for this chapter. Please watch it from 6:41.
The Head
Create a chain of two bones and give it the spines.super_head Rig Type. The first bone will be treated as a neck so let’s make it really short as our alien has virtually no neck. The second bone in the chain is the actual head.

Aligning the first bone of the head to the last bone of the spine brings some benefits. I have explained this many times in the videos for this course. In armature Edit Mode just use the Shift+S shortcut and the Cursor To Selected and Selection to Cursor options. Then in the Rig Type options for the head make sure you check Connect Chain.

The Tentacles
Surprise, surprise: I’ll use limbs.simple_tentacle here. Three bones for the left one, four for the right one. Make sure you align the bones to the curvature of the “feelers”.

The Eye
To add control for the eye I’ll create a basic.super_copy and place it right at the pivot point of the eye (which is a separate object in my example file). The “Deform” option should be turned off in the Rig Type options.
- add a basic.super_copy sample and rename it “eye”
- In Object Mode select the Eye object and press Shift+S > Cursor to Selected
- Select the Armature, go to Edit Mode, select the “Eye” bone and press Shift+S > Selection to cursor
- Now just align the tip of the bone to be as big as the character’s eye
- In the Rig Type options uncheck “Deform”

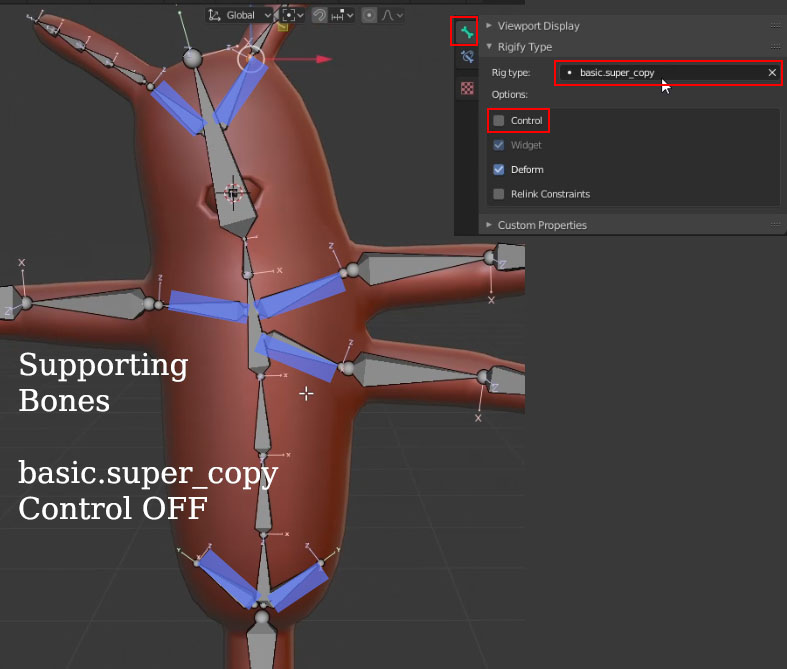
The Supporting Bones
I’ll add support bones in the pelvis, chest and skull area. All of them will be basic.super_copy with “Control” option turned off in the Rig Type options.
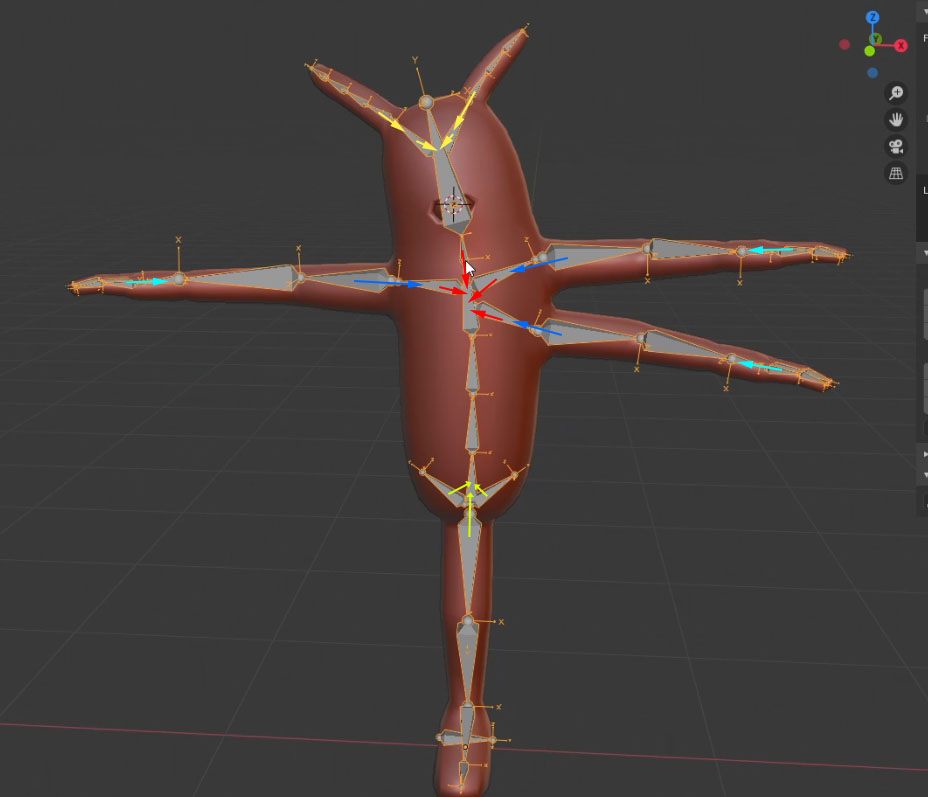
Parenting the Building Blocks
Parenting the Rig Types is extremely straightforward. If you did the previous exercise you should be able to do it yourself but I’ll explain it with images below just in case.
You may be confused about whether to parent the arms to the spine or the supporting bones. The answer is that it doesn’t really matter but for the sake of consistency, I always parent the bones that are closest together.
Parenting operations that need to be performed:
- tentacles/feelers to head supporting bones
- head supporting bones to head
- neck & chest supporting bones to the last bone of the spine
- arms to chest supporting bones
- fingers to the closest arm bone
- leg & pelvis supporting bones to the first bone of the spine
Generate and Test
With that your meta rig is ready. Just press Generate rig and parent the Alien to the newly Generated rig with Automatic Weights. Now you can play around with the controls to see if it behaves correctly.
Parent the eye directly to the Eye Bone
- The eye needs to be parented in a slightly different way. Select the Eye object, shift-select the Generated rig.
- Switch to pose mode, select the “Eye” bone, press Ctrl+P and select the “Bone” option.
Now the Eye object is parented directly to the Eye bone (without weights).
Main Series is almost over
If everything went smoothly, your rig should work correctly now. At this point you should have super solid foundations on which to build your own custom rigs with Rigify.
If you want to go deeper, learn the customization options for all Rig Types and create even cooler rigs with me, you should check out the full course which is currently available for preorder at 80%+ OFF. I am about to add more videos to the course so the price will go up very soon.
Either way there is at least one more free chapter coming soon. There we’ll learn how to make our custom rigs more user friendly!
The chapters 7 and 8 are not on your website and how do I download them? They are on youtube but I want them on my computer as part of the course I bought. I also wasn’t notified about the chapter 8 but I am subbed to your youtube and that is how I know about it.
You need to update this information across your platforms especially for those who want to download the latest chapters.
Thanks.
After you made the spines.super_head Rig Type, you made sure ‘Connect chain’ box was selected. What does the Connect chain box do?
It connects the spine and the neck bone with a tweak/stretch control. Honestly it is not that important. But if you do use it make sure to snap the neck and spine as shown in the tutorial.