
This is the second chapter in my course “Rig Anything with Rigify”. A course that will show you how to use Rigify in Blender to significantly speed up and simplify the character rigging process. The article and video for Chapter 1 are HERE. An overview of the whole course can be found HERE.
In this chapter we’re going to take a bird’s eye view of the Rigify workflow. This is the only chapter that’s almost purely theoretical. We’ll practice a lot in the next parts of this tutorial.
Check out the video below. If you prefer to read, you’ll enjoy the article that follows. I recommend doing both 🙂
Step 1: Prepare Character for Rigging
This step does not relate directly to Rigify but it’s important nonetheless. Whenever you rig a character you want to make sure that it meets certain standards.
Here is my checklist, that I go through every time I want to rig something
- Character faces front
- Feet on the “ground” of 3D World
- Pivot point in Center of 3D World
- Apply Scale and Rotation
- Model to scale
- Humanoids in A-Pose
- Non-humanoids in a “neutral” pose
- “Good” topology
This is my personal list. It’s not definitive or anything like that. As you gain experience you’ll make your own rules that ensure the quality of your rigged characters. I want to keep this chapter focused on Rigify so let’s not go into detail here. We’ll practice applying this checklist in the next chapter.
Step 2: Create a Rigify “Meta-Rig”
●What is a meta-rig?
The Meta-Rig is one of the most important concepts that you need to understand to rig with Rigify.
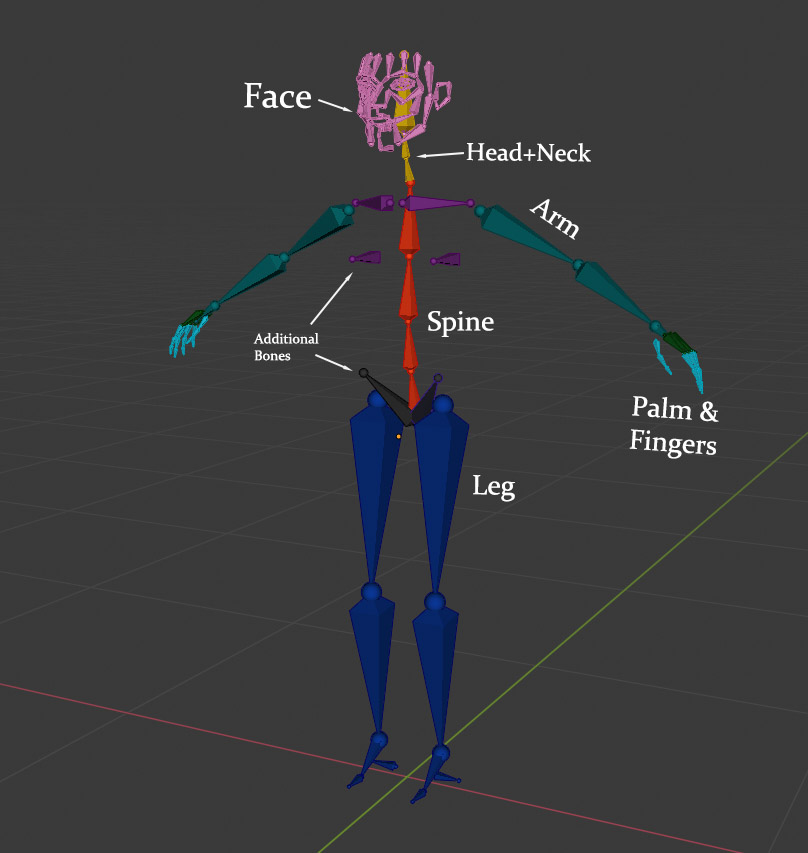
Meta-Rigs are simplified versions your final rig. They are constructed using default Blender bones/armatures. So all the knowledge you have about creating and manipulating bones, parenting etc. are applicable here. Yay!
Even tho it appears like a normal Armature on the surface, a meta-rig consists of the Building Blocks (arm, leg, tail etc.) that we briefly mentioned in the previous article. Rigify identifies the building blocks through a special property that is set for each component. We’ll learn how to set up this property soon.
● Pre-built Meta-Rigs
Rigify ships with several pre-defined Meta-Rigs. In the very next chapter we’ll learn how to work with them.
Here are the rigs you get by default:

This s a great feature that allows you to rig certain types of characters in minutes!
At the same time this very feature has done a disservice to the addon as a whole. Since most Rigify tutorials focus exclusively on the pre-built Meta-Rigs, many Blender artists are left with the impression that this is all Rigify has to offer.
But as you probably already understand you can rig ANYTHING with Rigify. 🙂 The meta-rigs above are simply a combination of the Building Blocks.
● Meta-Rig Creation methods
Generally there are two ways to create a meta-rig.
① You can choose one of the 6 or so pre-built ones and roll with it. This method is easy, quick and efficient… but limited. If your character doesn’t fit any of the existing rigs, you’re left scratching your head. Also if you don’t grasp Rigify on a deeper level you’re very likely to get errors that are difficult to troubleshoot.
② The second option is to create your own meta-rig from scratch. Once you gain a little bit of knowledge, this method is also easy, quick and efficient 🙂 As for limitations, there are relatively few. My focus in the tutorial series is on this approach. When you can do this, the meta-rigs shown above become just a shortcut to speed up your work whenever it makes sense.
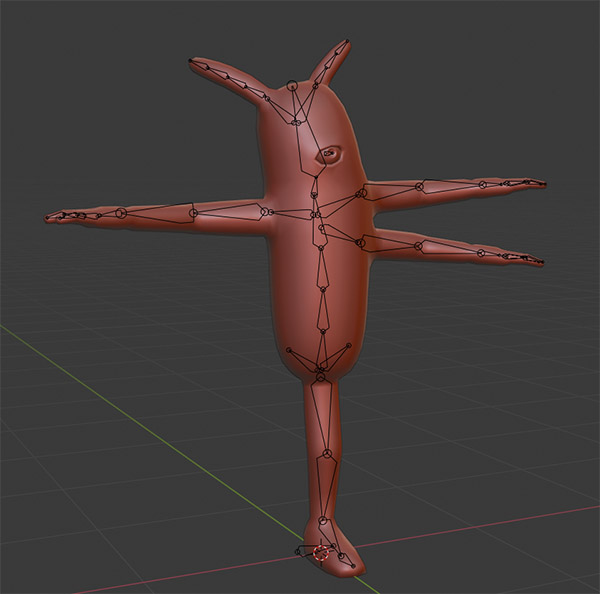
Step 3: Align Meta-Rig to Character
The meta-rig is a simple representation of your final rig. Therefore you need to ensure that all rig features (i.e. building blocks) match the features of your character. E.g. the thigh bone is aligned with the thigh of the character, the upper arm bone to the upper arm, head bone to head etc.
This step is very easy and we’ll practice it a lot in the coming exercises.
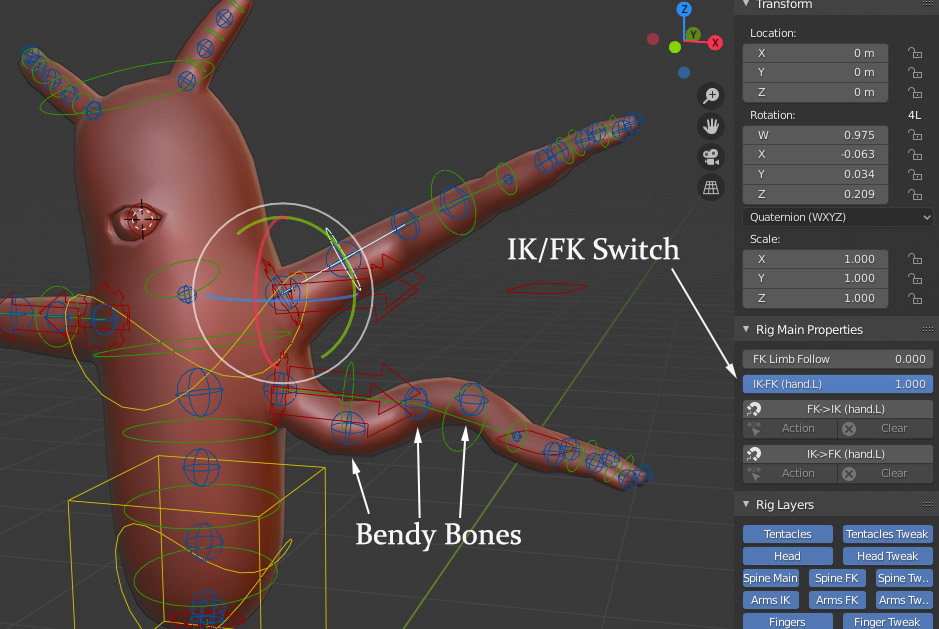
Step 4: (Optional) Setup Rigify Bone Groups and Layers
This is an optional but recommended step you can perform to make your rig more user friendly. We’ll practice this step in detail in chapter 7.
For now this image should help you appreciate how cool this feature is.
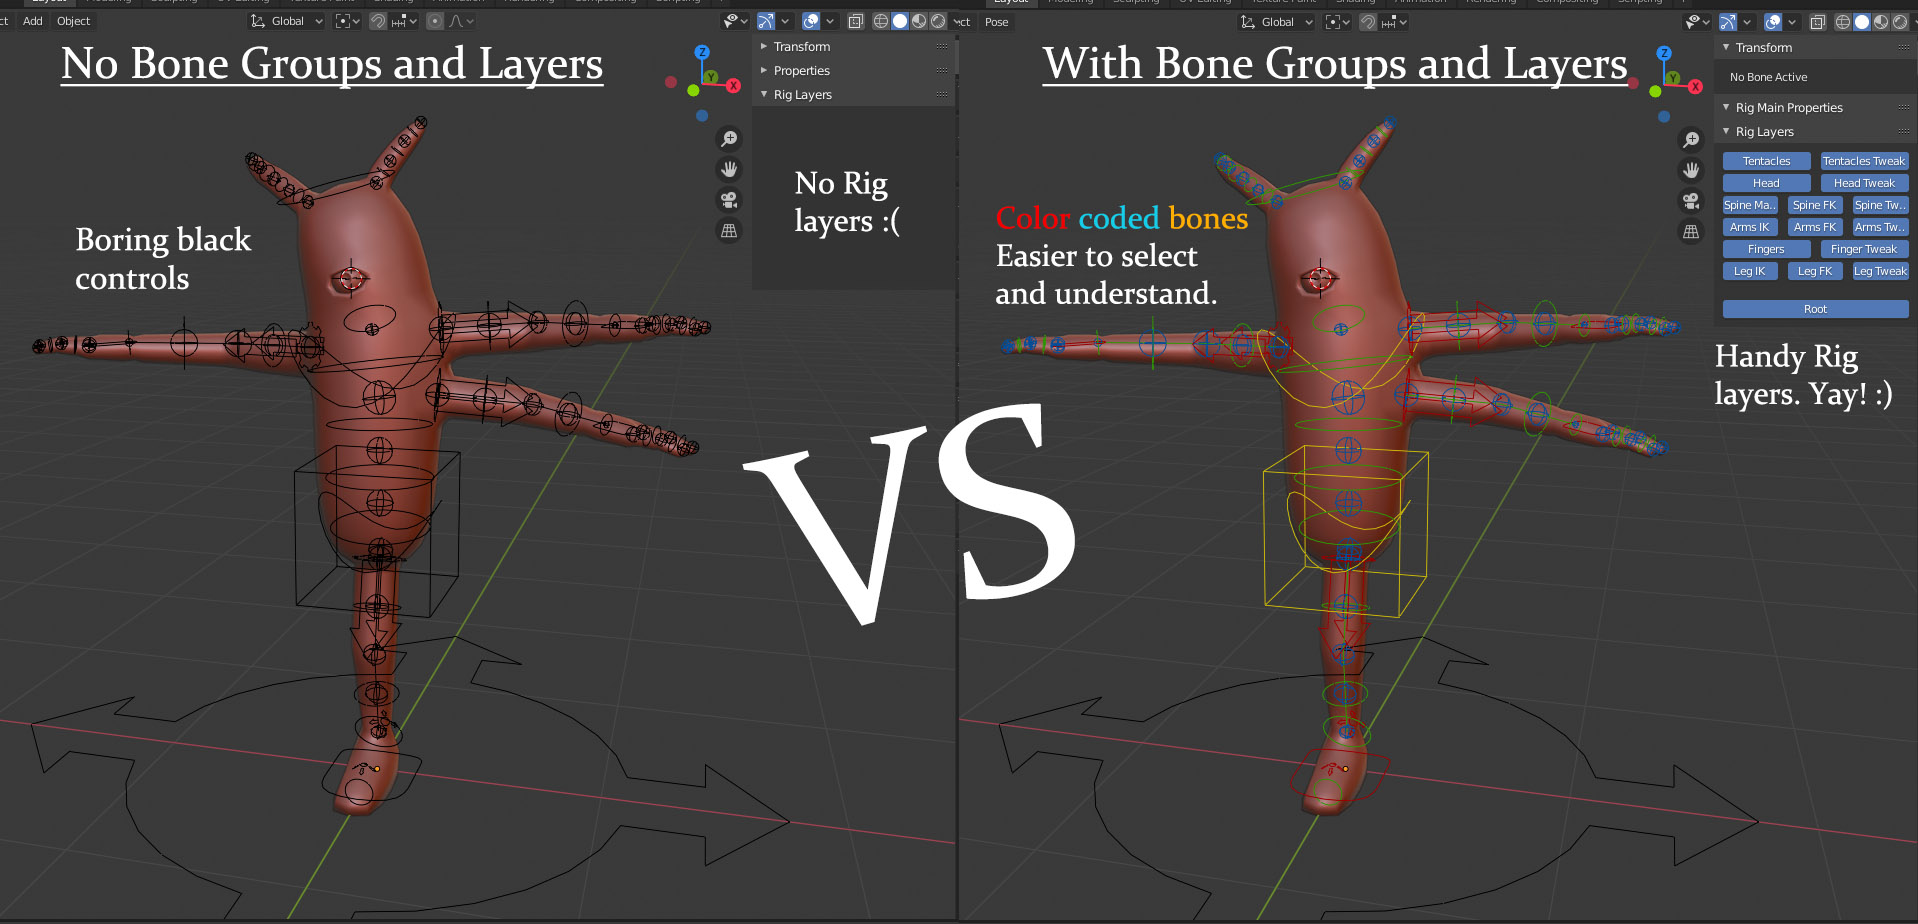
One of the cool things about the pre-built meta rigs is that this setup is already done for you!
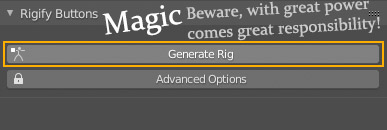
Step 5: Press “Generate Rig” (aka “The Magic Button” 😀 )
When your meta-rig is aligned to your character and all options are set up, all you have to do is press a single button in the Rigify interface: Generate Rig.
(…actually it’s pretty harmless and any mistakes can undone :P)
As soon as you do Rigify will work its magic and present you with a finished rig. The process usually takes a few seconds. Don’t let the speed of the process fool you tho! The rig you get is state-of-the-art. Something that would take even a professional rigger many hours of hard work to construct.
To be fair, Rigify can be finicky so there is a chance you’ll get an error while trying to generate the rig. This throws a lot of users off. That’s unfortunate because usually there is an easy fix. One of my main goals with this course is to demonstrate the various problems that you can stumble upon and how to troubleshoot them.
When you identify and fix the problem, just press Generate Rig again.
Step 6: Test your Rigify rig
Assuming that your rig generation went smoothly, the next step is simple. You just quickly parent your Character to the Generated Rig, using Blender’s Automatic Weights option. This gives you very fast yet decent vertex weights and you’ll be able to see if all features of your rig perform as expected. (We already practiced this in the video tutorial in Chapter 1)
Step 7: Looking good?
If your rig behaves well, that’s great and your work with Rigify is done! After that you may want to improve your vertex weights and start posing and animating.
But if you find a problem you’ll want to look into the next step.
Step 8: Rig Re-Generation with Rigify
If you’re not quite happy with your generated rig, you can always go back to your Meta-Rig (which is preserved even after you press Generate Rig). You can make changes to it and try to generate again. This is called rig re-generation and it’s a truly unique feature found only in Rigify. For example, you could change the position of your characters arm. That would be easy. But you could even add an additional arm if you wanted. You can do anything you want.
Because working with Rigify is super fast it’s common to re-generate your rig often while experimenting with different building blocks and options.
Conclusion
This is the Rigify workflow in broad strokes. In the next chapter we’ll start practicing and gain experience with all of the steps mentioned above.
You’re doing a great job Ma,,Keep up it.
Best regards,
watched chap1 , great explanation and tips
Thanks!
This is brilliant!!!!
Thanks!
You made some really good points on your post. Definitely worth bookmarking for revisiting.
This is some awesome thinking. Would you be interested to learn more? Come to see my website at YR4 for content about Airport Transfer.