
Rigging in Blender is difficult. The basics are easy to grasp but when you start getting into advanced rigging, things get really complicated really fast. To master this craft you need a synergy of artistic and technical skills and those literally take years to develop.
A lot of Blender artists need a good and versatile character rig but don’t have the time to learn all the ins and outs of rigging. This is where Rigify comes in. Rigify is an addon that simplifies the rigging process immensely.
This is the first chapter in a series of 7 (maybe more 🙂 ). Below you’ll find a video tutorial and an article. In this case I recommend reading the article first, then doing the exercise in the video. Therefore you’ll find the video again at the end of the post.
Before we start
I assume you have installed Blender and have basic knowledge of the interface. If you don’t I highly recommend taking a look at the official training series provided by the Blender Foundation.
OK, let’s cover some basics first.
What is Rigging?
Rigging in Blender (and other CG software) is the art of enabling your 3d characters to move and act. Without a rig your character will be limited in the movements it can perform. A rigged character on the other hand becomes a digital puppet that you can animate and pose freely.
Here are some of the keywords you’ll encounter often when dealing with rigging.
- bones are the most basic building block of your rig. Very often CG bones correspond to actual anatomical bones. (But not always!)

- parenting or parent-child relationship is the most basic way to create a hierarchy between bones.

- armature. this term is specific to Blender. An armature is a special kind of object. Instead of vertices and polygons, it consists of hierarchies of bones which we just discussed.
- constraints and drivers are ways to create automation inside your armature. It can be anything from making the character’s biceps flex when the arm bends. To setting up a super complex “Transformers” type effect.
- rig: an Armature with all of it’s hierarchies, automation etc. is generally called a “rig”.
- skinning or weight painting: this is a way to tell Blender which bones affect which part of the character. So your thigh bone moves the thigh area and the foot bone moves the foot etc.

This may be a lot to take in but don’t worry. It’s something you’ll figure out with practice. And since we are talking about rigging with Rigify here, you only need to understand the basics. With Rigify, you’ll almost never have to setup drivers and constraints, which is one of the most mind-rattling activities you can engage in.
What is Rigify?
Rigify is an automated modular rigging system for Blender. Wow! That’s a mouthful. Luckily that simply means:
Rigify is a system that allows you to rig almost any character you can imagine. With ease!
But let’s look at the terms:
- modular: Rigify provides a bunch of modules or building blocks or components. E.g. arm, leg, tail and so on. You build your rigs out of them.
- automated: a lot of the tedious technical work is done for you. With rigify you just kinda direct your rig. You say: I want an arm here, a leg there and they are connected to this spine. Then rigify works some magic and your character is ready to come to life. 🙂
The idea is that you can describe the anatomy of almost any creature, even a fairly bizarre one, with a limited number of components. (Thanks evolution!) All in all there are around 15 Rigify building blocks. Doesn’t sound like a lot, right? But when you put them together they create unlimited variety.
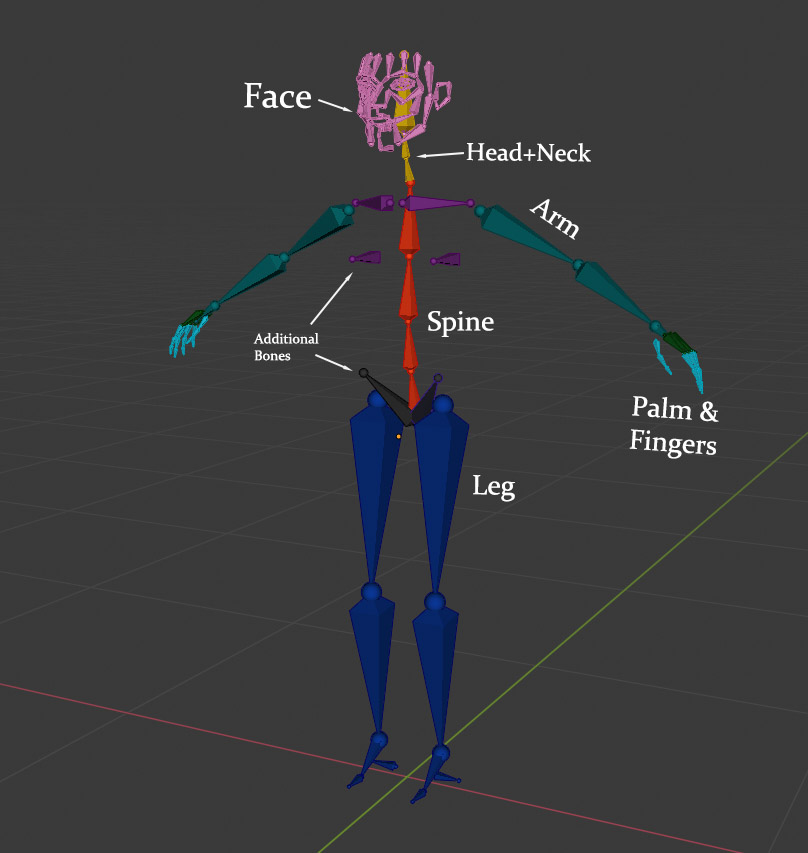
If you’re curious about the components that Rigify offers here is a list:
- human leg
- animal leg
- arm
- tentacle
- spine
- head and neck
- tail
- face
- simple bone (without automation)
- simple chain of bones (without automation)
- (and a bunch of special function presets)
My hope with this series is to an get more people using Rigify. When rigify gets more attention it will get more development. The more this addon improves, the more elaborate building blocks will be added. But I digress.
Rigging Practice
Now we know what rigging is in theory. We also have a basic idea how Rigify can help us make this process easier. So off we go to Rigify, right?
Well, no…
Jumping straight into Rigify would be a frustrating experience. We need at least a beginner’s understanding of Blender Armatures/Bones. In the video tutorial below I’ll show you how to rig a basic human. We’ll keep things simple but we’ll get to practice most of the concepts I mentioned above. You’ll get a feel for bones, armatures, parenting, even some constraints and skinning.
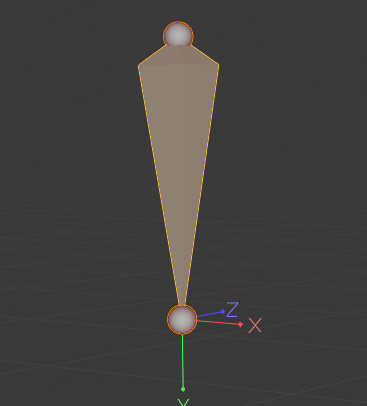
We’ll start the tutorial with this simple base mesh. If you haven’t downloaded the besemeshes, they are HERE.

I personally find video tutorials easier to record and consume. Would you prefer a written tutorial supplemented with images? Let me know in the comments and if there is enough interest, I’ll make it happen.
Woah! You did it! 🙂
Congrats. If you did the exercise above you can start learning about Rigify. In the next chapter I’ll give you an overview of the Rigify Workflow.
This is very clear. Thank you!
Thanks for your interest, Tigret! Glad you liked it!
very nice course (bought the manual as well). Thanks! I have not yet ran through all the content purchased, but I am not seeing any in depth explanation on skinning or weight painting, which is where I usually end up having problem (still learning blender) and cannot find anywhere good and practical explanations on how to best do it… also i kind a feel its still a bit glitchy… wondered if I am doing this the right way.
thanks
Hey, thanks for purchasing!
As for weight painting, I tried to avoid the subject because the course is focused on the features of Rigify. But I did receive a bunch of requests for Weight painting tutorial. So, I intend to make one but it will be a free video on my youtube, not part of this course. So keep an eye on my channel https://www.youtube.com/c/cgdive 🙂
Personally, I prefer written content over video. Video moves fast and a lot is missed, especially when pointing and clicking on menu items and talking about them. A quick written tutorial could be made from the video transcript. I usually grab the transcripts and clean them up for reference instead of videos, but then miss the visual cues that would be assisted with images.
I know many people do like written tutorials. I really need to make all my video tuts into written ones but I simply don’t have the manpower to do so (I only have 1 single manpower lol).
I watched your course videos and tried to rig the dragon you gave in practice blend file , I took all sample which is need to generate rig ,I parent all the bone which is necessary ,but when I tried to generate rig using rigify in Blender 3.0 stable ,it shows an error , generation has thrown an exception but when I use the same file in 2.93.7 it’s generate the rig without any error