
Table of Contents
- Pinning Objects to a Deforming Surface
- Preparing the Mesh
- Parenting the Object to the Surface
- Single Vertex Parenting vs. Three Vertex Parenting
- Pinning a Bone to the Surface
- Dealing with Dependency Loops
- FAQ
Rivet Rig: Pinning Objects to a Deforming Surface
In Blender rigging, you may sometimes need to pin an object to the surface of another deforming object in your rigging setup. This is often referred to as a “rivet rig” and can be a useful technique when you want an object to move with the surface it’s attached to without deforming. In this tutorial, I’ll show you how to create a rivet rig in Blender to achieve this effect.
Preparing the Mesh
Let’s start by setting up our scene. Suppose we have a character with a knife attached to their leg. Currently, the knife is parented to the character with weights, so as the character’s leg deforms, the knife stretches and distorts:
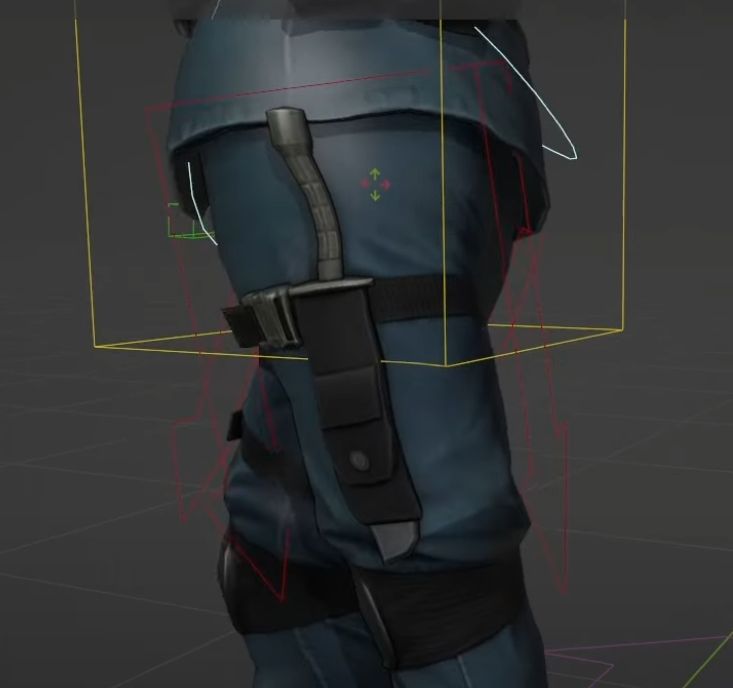
To fix this, we’ll need to separate the knife into its own object and then pin it to the surface of the leg.
In Blender’s Edit Mode, select all the parts of the knife and press “P” and choose “Selection” to separate the prop into a new object. Now, the knife is its own independent object, which is exactly what we need.
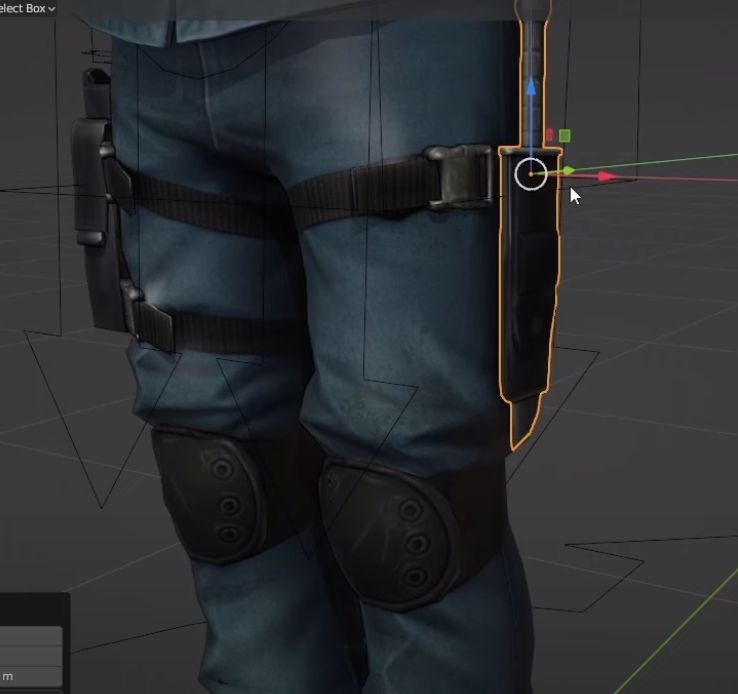
Adjusting the Origin Point
It is important to note that the origin point of the newly separated object may affect the setup. You want the origin close to the rivet location:
Parenting the Object to the Surface
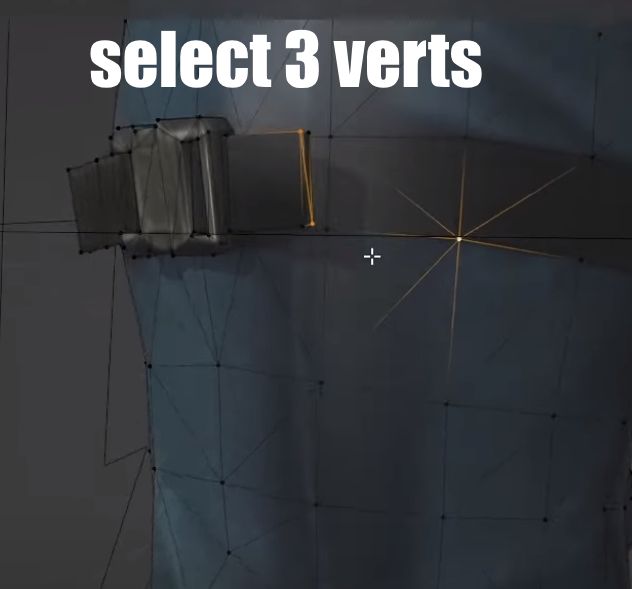
The next step is to parent the knife object to the surface of the leg. To do this, we’ll use a technique called “vertex parenting.” First, select the character object and go into Edit Mode. Choose three vertices on the leg in the area you want the knife to become attached to. The vertices do not need to be connected but choose three points that are close to each other.
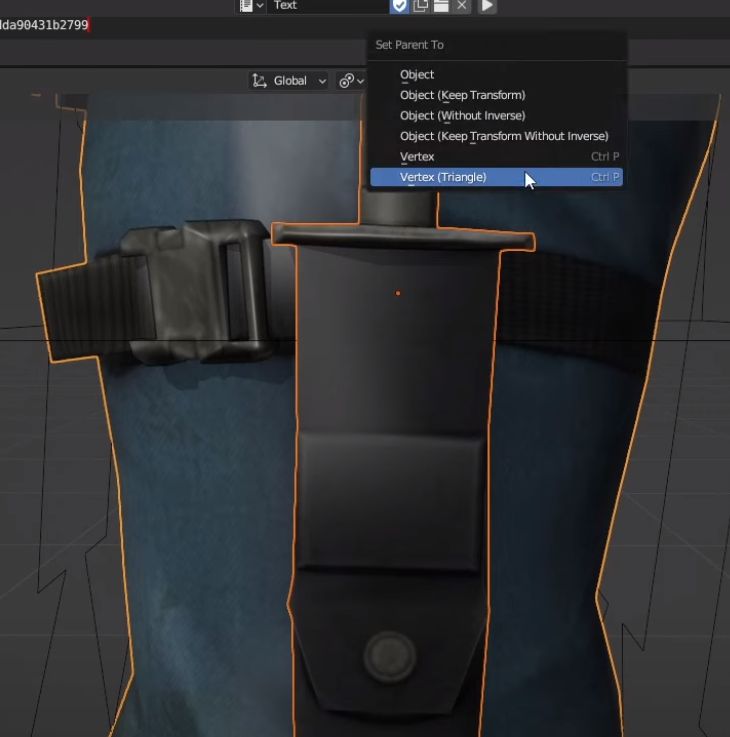
Then go back to Object Mode, select the knife object, hold Shift, and select the character object. Press Ctrl+P and choose “Vertex (Triangle)” to parent the knife to the selected vertices.
Now, when you move the character’s leg, the knife should follow the surface without deforming. However, you may notice that the knife’s movement is slightly unpredictable. This is because the knife still has an Armature modifier, which is influencing its behavior. To fix this, delete the Armature modifier and remove any existing vertex groups from the knife object.
Single Vertex Parenting vs. Three Vertex Parenting
You may be wondering if you can use a single vertex to parent the knife instead of three vertices. While this is possible (notice the “Vertex” option just above “Vertex (Triangle)” when you press Ctrl+P), it’s generally not recommended. When you parent an object to a single vertex, the object will follow the movement of the vertex but not its orientation… because a vertex doesn’t have orientation, it’s just a point in space. This can lead to the object clipping or behaving unpredictably. Using three vertices provides Blender with enough information to understand the orientation of the surface, resulting in a more stable and predictable attachment.
Rivet rig: Pinning a Bone to a Surface using “Child of”
Now, let’s say you want to pin a bone to the surface of the mesh, rather than an object. This can be necessary e.g. when you plan to export the character to a game engine or another application.
Blender doesn’t allow you to directly parent a bone to mesh vertices. But we can use an intermediate object to achieve the same effect.
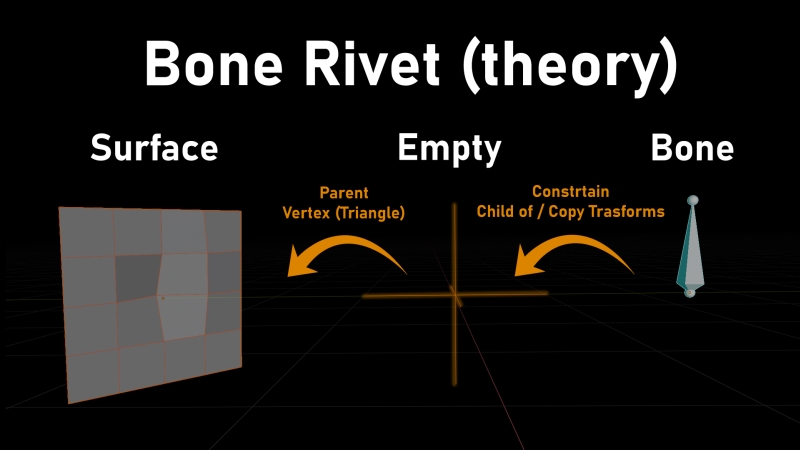
First, create an empty object and position it where you want the “rivet” to happen. Then parent it to 3 vertices just like with did with the object earlier:
- In Edit Mode, select the three vertices on the leg where you want the empty to be parented
- go back to Object Mode, select the empty, hold Shift, and select the character object
- Press Ctrl+P and choose “Vertex (Triangle)” to parent the empty to the surface.
Next, create a new bone in the Armature and position it at the location of the empty. In Pose Mode, select the new bone and add a “Child Of” constraint, targeting the empty object. This will allow the bone to follow the movement of the empty, which in turn is pinned to the surface of the mesh.
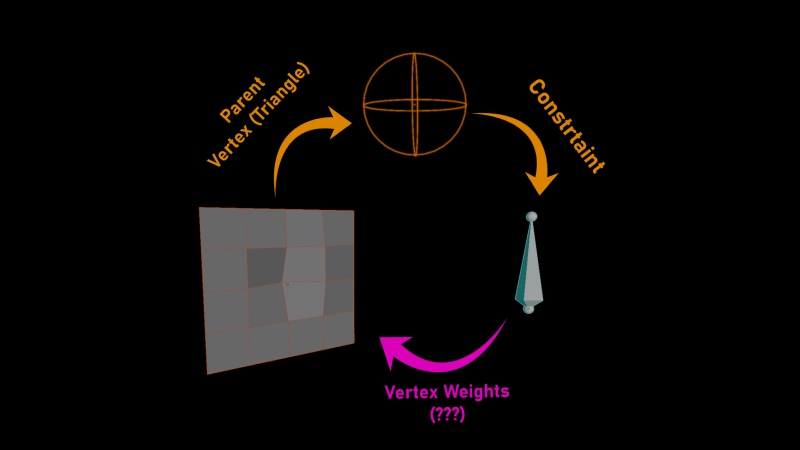
You also have to make sure that the knife mesh will follow the new pinned knife bone so weight the geometry fully to the bone.
Dealing with Dependency Loops
One potential issue you may encounter when using this technique is a “dependency loop.” This can happen when the bone you’re trying to pin is affecting the surface it’s attached to, which in turn affects the empty, and so on. Strangely this issue will arise even if the knife has 0 influence over the surface we are pinning it to. As long as there is a “knife” vertex group on the character mesh, Blender will get confused.
To solve this, you’ll need to separate the object you want to pin (in this case, the knife) into its own separate object. That should already be the case if you followed this tutorial.
Then remove any references to the pinned bone’s vertex group from the main mesh. In this example, remove the “knife” vertex group from the main character mesh. On the knife mesh, on the other hand, remove all vertex groups except the “knife” one. This will finally satisfy Blender and the Dependency issue will be solved.
Alternative: pinning with “Copy Transforms” constraint.
Alternatively, you can use a “Copy Transforms” constraint instead of a “Child Of” constraint. This approach requires an additional intermediate bone, which acts as a buffer between the pinned bone and the empty. This can create a more stable setup and give you more control over the bone’s movement.
FAQ
Why can’t I directly parent a bone to the surface of a mesh?
Blender doesn’t allow you to directly parent a bone to the surface of a mesh because… Blender reasons. 🙂 Let’s hope this will become possible in future versions. Using an intermediate object, like an empty, can help you work around this limitation.
What’s the difference between using three vertices vs. a single vertex to parent an object?
When you parent an object to three vertices, Blender has enough information to understand the orientation of the surface, resulting in a more stable and predictable attachment. With a single vertex, the pinned object will not follow the orientation of the surface, leading to clipping or unpredictable behavior.
I hope this tutorial has helped you understand how to create a rivet rig in Blender. The key is to use “3 vertex parenting” and intermediate objects to pin objects or bones to the surface of a deforming mesh. With a little practice, you’ll be able to create smooth and stable rivet rigs for your characters.
Let me know if you have any other questions!