In this tutorial I am going to show you how I created my lips alpha pack. So by the end you’ll know how to create high quality alphas (not just lips). I’ll also share FREE samples of my alphas and other resources so stick around to find out the details 🙂 .
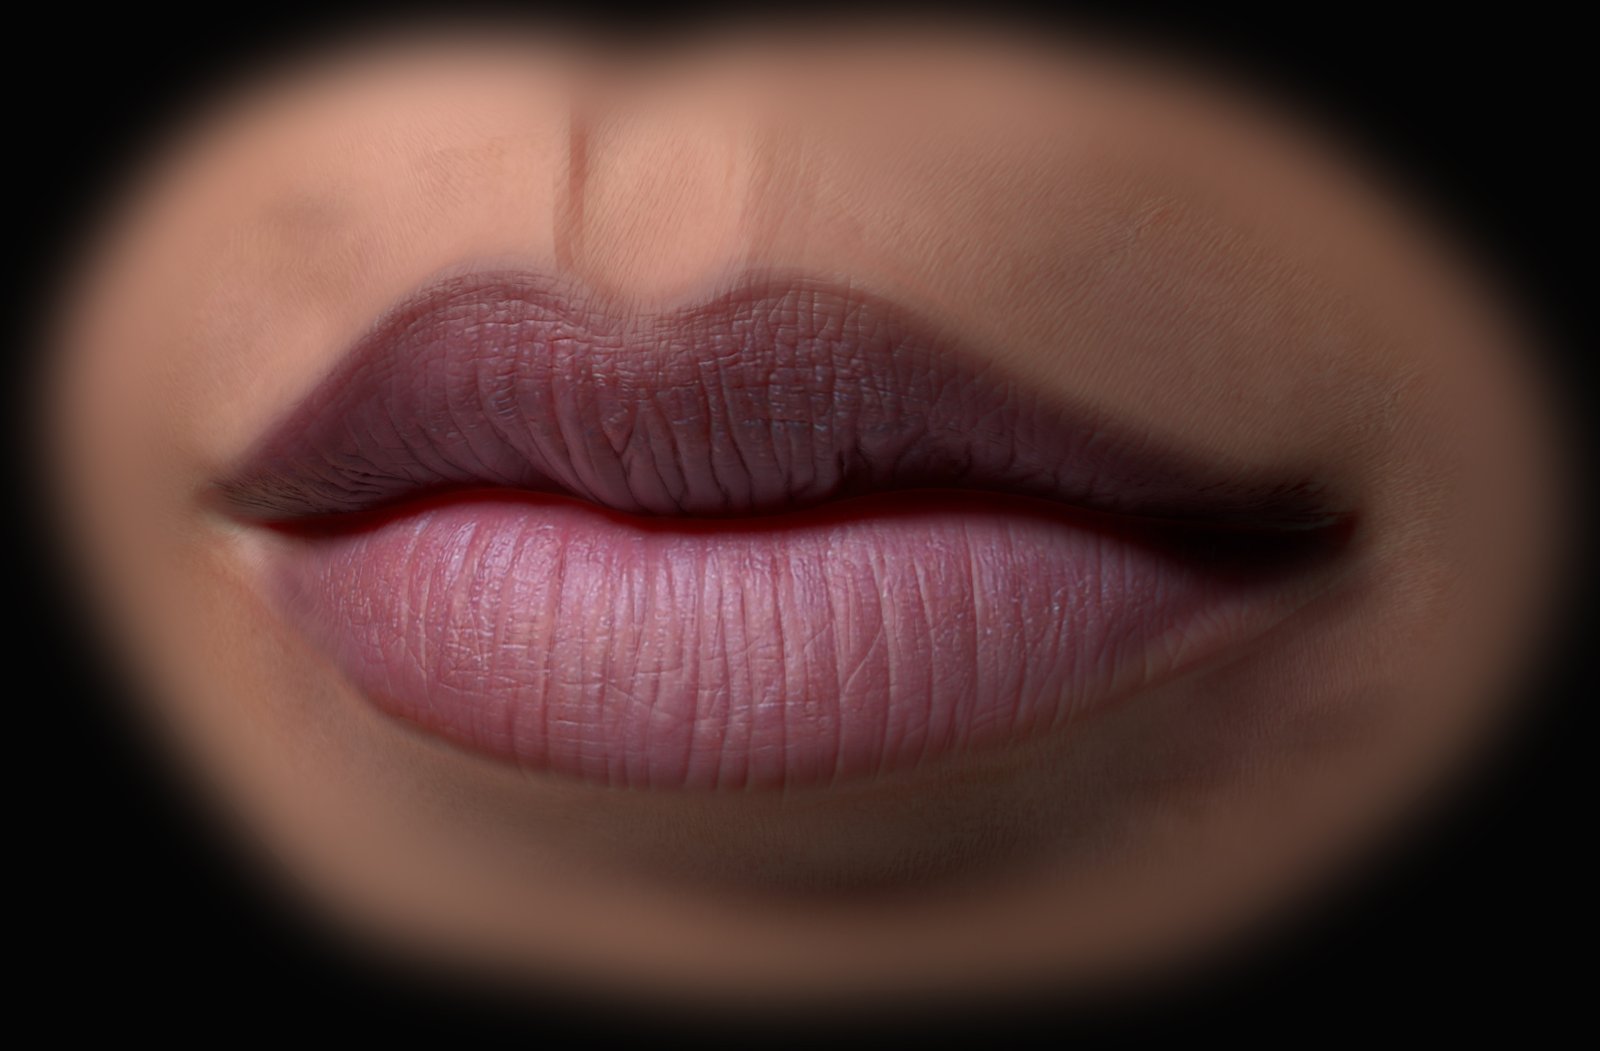
click to enlarge
Process Overview
Here is an overview of the whole process so you know what to expect:
●Project photo details on 3d mesh
●use projected texture as displacement
●enhance projected details by painting in photoshop/gimp/krita/…
●further enhance details through manual sculpting in blender/zbrush/…
●bake out displacement map
●clean up displacement map to finalize your alpha
Making skin detail alphas based on photos is challenging because of all the specularity, sss, shadows etc. Manual work is hard to avoid. You’ve been warned! 🙂
I start with a simple model of the lips.
When creating some types of alphas you could just use a plane mesh. But with lips I think it’s nice to see something that resembles the final result. I created a UV layout that emphasizes the lips area. I’ll share this base model free in a second.
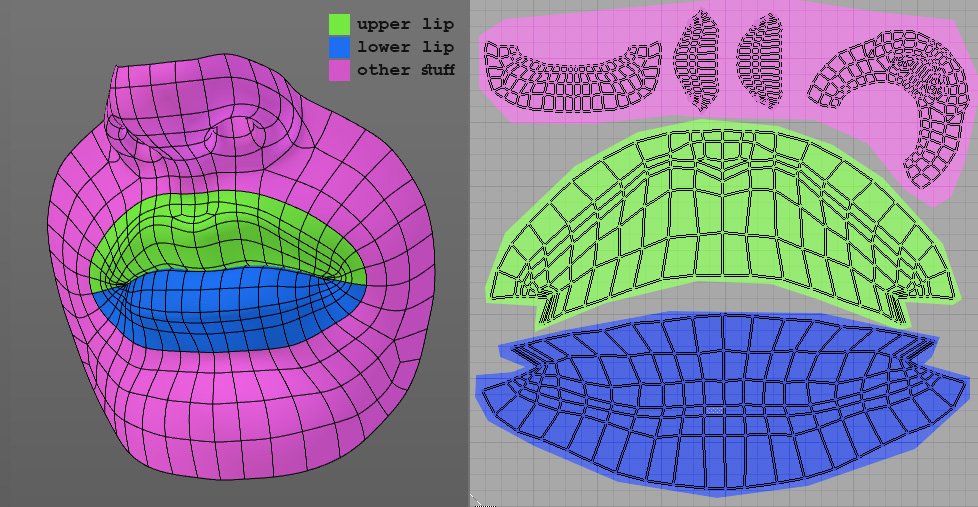
click to enlarge
If you want to follow along here is a 3d model and reference images.
Download from Dropbox || Download from GDrive
Speaking of reference images… WHERE DO YOU GET GOOD REFERENCES FROM???
The easy thing to do is go to google image search and type in whatever you’re looking for. E.g. lips.
With all the editing we’ll do to the image I think almost any image would be OK to use. It’s always good to be on the safe side of the law tho. Luckily I found an amazing free resource with a very permissive license.
https://www.pexels.com/
I’ve include some really good lips images from that site in the package above.
I then project photo details on the lips.
The workflow I use is Blender’s Quick Edit in an external app. If you’re not sure what I am talking about here is a video that explains it well:
In zbrush you could use zapplink to do the same.
Alternatively you could use a stencil to project the details but I personally don’t like this workflow. Or if you’re old-school you could conform the photo reference to the UVs in photoshop/gimp. Whatever works for you.
When I am done projecting I apply the generated texture as displacement. That inevitably look like crap. 😢 💩 Not to worry, we’ll fix that pronto!
The Modifier setup I use in blender looks like this:
-Multires, 6~7 subdivs or so (Multires, not Subdivision!)
-displacement modifier
This is will become important in a later step.

The next step is to try and “grade” your texture. The guys from Flipped Normals have an excellent tutorial on how to do that.
In fact this tutorial inspired me to make my own alphas. In some cases grading takes you a long way…
…with lips however I found it to be hit-and-miss. Sometimes it helps a bit, other times not so much.
Here is my result after grading. Still quite meh 💩 😀 As I said this process is not as helpful with lips and in this particular case it was almost pointless. But in other scenarios it’s priceless. I include it for the sake of completeness.
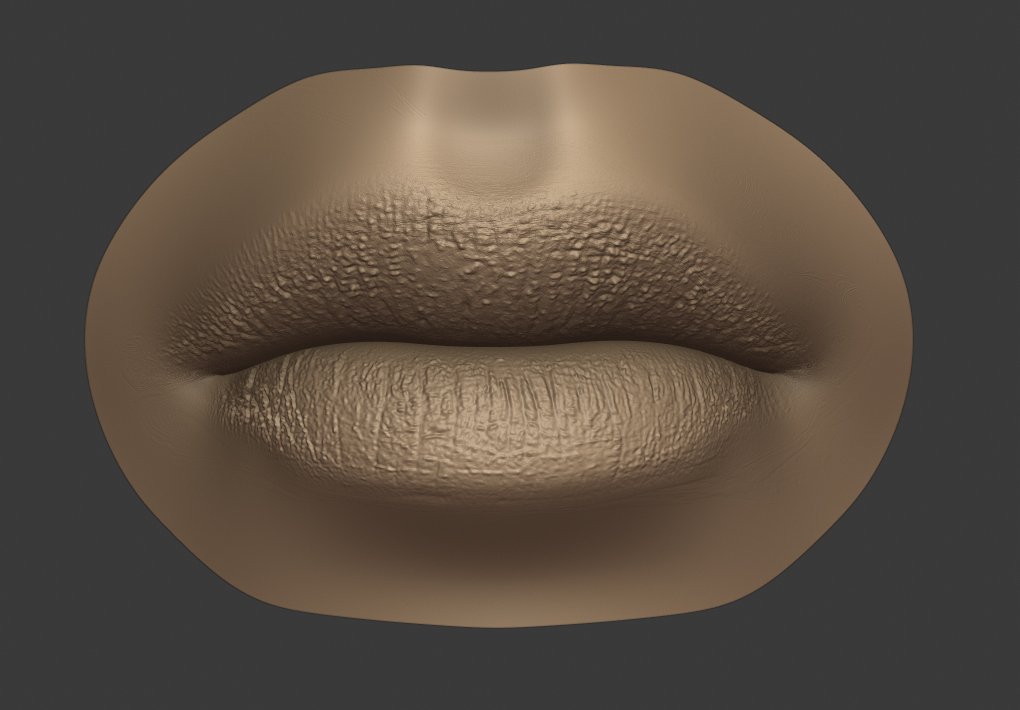
From here the serious manual work begins. Yay!
● In photoshop I load the projected texture. I emphasize all wrinkles by drawing black lines wherever I perceive a wrinkle. I’d recommend splitting the lines/wrinkles in to primary and secondary. This gives you a nice
variation in detail.

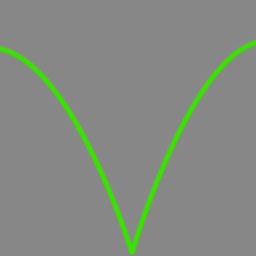
● keep the lines on separate layers. Then duplicate the layers a few times and blur each layer progressively.

This gives you a crisp wrinkle which gradually fades away. Basically this sort of V-profile:
●I emphasize the space between the wrinkles by painting light areas with a soft brush with low opacity. You can go heavy handed here. Or you can be precise if you want a specific detail.
After the manual painting in Photoshop I get this.

click to enlarge
Once the displacement starts to look decent I apply the Displacement modifier. That gives me a fully usable Multires mesh that I can work with in Blender. That’s why I said that the modifier setup (Multires + Displace) is important. This is a really powerful workflow in Blender.
Finally I sculpt the details some more by hand. For this step I often move to Zbrush but it can be done in Blender or whatever sculpting app you like. With this example I actually sculpted it in the new Blender 2.8. The new eevee viewport/workbench is a pleasure to sculpt in.
If I were to use zbrush I would export the displaced highest res mesh to zbrush and use “Reconstruct Subdivs” to get a proper subdivision mesh.
The brushes I use:
Blender: Crease (to emphasize wrinkles), Inflate (with a largish brush to emphasize areas between wrinkles), Sculpt/Draw(for specific details), Pinch (use sparingly)
Zbrush: DamStandard (to emphasize wrinkles), Inflat (with a largish brush to emphasize areas between wrinkles), Standard(for specific details), Pinch (use sparingly)
Nothing fancy.
This is my finished result.
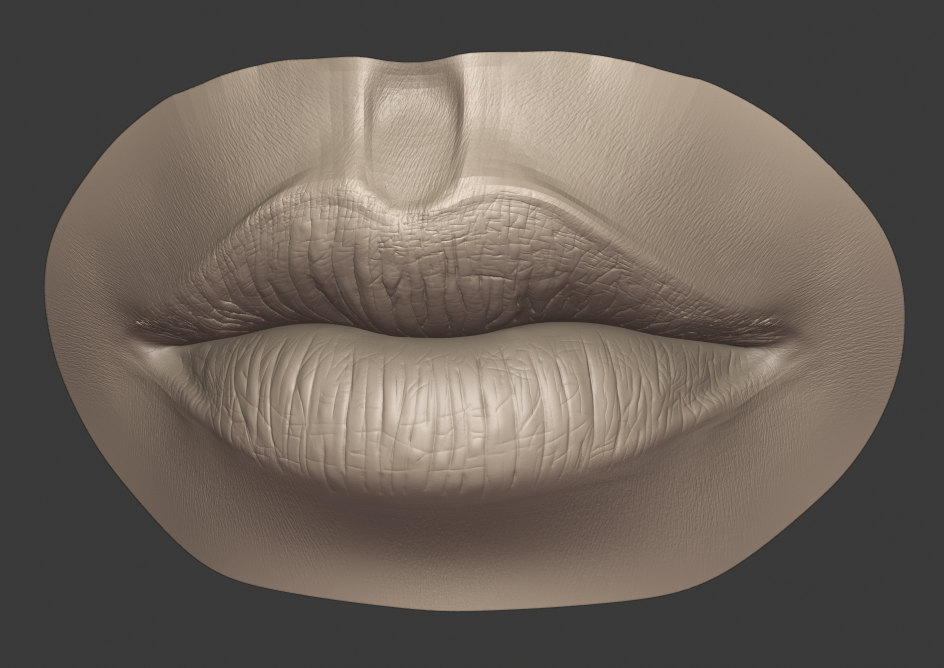
Now that we have created really nice detail we need to bake the displacement. With that we’re almost done!
For this step I have developed a workflow in zbursh that I stick with.
I use MultiMap exporter plugin because it’s easy to work with. My Displacement Map setup looks like this.

Notice that Scale is set to 10. When you try to bake the map, zbrush will ask you if you really want to go with those settings. Say YES. The default setting of 1 produces displacement that is too weak our purposes (generating alphas). Sometimes I set Scale to 20 or higher. You have to play with the settings and see what works best.
I set the image resolution to 4k. That gives me enough resolution to create 1k or even 2k alpha maps afterwords.
I like working with 32 bit EXR images. They produce great results and I can convert them to other formats and bit depths if I need to.
Finally I take the displacement map and divide it up in chunks that can be used as alphas.
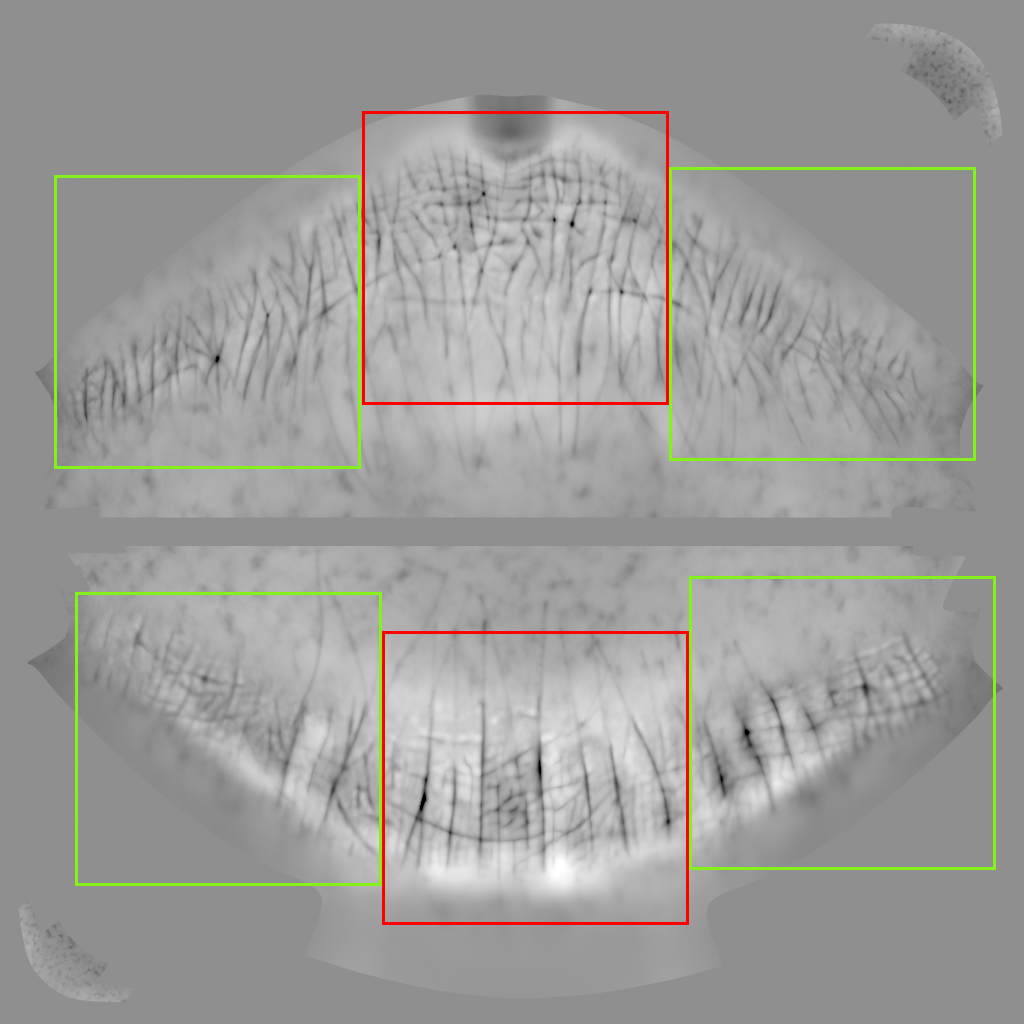
I paste each piece into a new Photoshop document (32bit) filled with 50% gray. Then erase the edges of the pasted detail to avoid sharp edges in my alphas. The final result looks something like this:

Note that if you work with 32 bit images as I recommend the detail in the image may be barely visible and thus hard to work with.
(The images in this tutorial have been tweaked for presentation purposes). To make them easier to work with, add a Levels Adjustment Layer and crush the values.
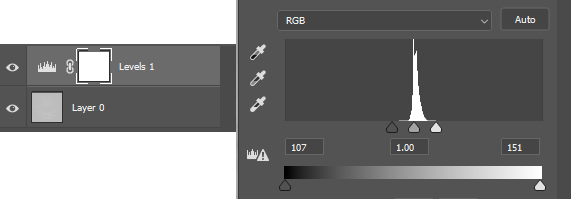
Remember to turn off the Adjustment Layer before you save out your final alpha.
DONE!
It’s an arduous process so if you stuck till the end, good job!
Finally you can grab the free alphas and resources here:
[gumroad id=”lipsfree” button=”true” text=”$0+ FREE Alphas and Resources!” ]
If you are interested in the full version of my pack, check it out here. For 5 bucks you can save yourself all of the above work x5 times! 😛
[gumroad id=”zbrush_lips_alphas” button=”true” text=”$6+ Purchase”]
If you have any comments or questions, share them below.
Other Alphas from my friends at Flipped Normals that you may like:
Before you go, if you know someone who’ll like this tutorial or the free alphas…why not share it with them?
Cheers and happy detailing!


[spam removed]
When I originally commented I seem to have clicked the -Notify me when new comments are added- checkbox and now every time a comment is added I receive four emails with the exact
same comment. Perhaps there is an easy method you can remove me from that
service? Thanks!
I’d like to take this support request seriously but that’s difficult with so many spammy links in your message. Post again or email me and we can talk about it.
good luck !)
You too :]
good article
file gone
Which file? All links seem to work.